If you’re an industrial operator working with lubricants, biofuels, or edible oils, you know an oil filling machine is only as reliable as its last thorough clean. As someone who’s spent 12 years selling, installing, and troubleshooting these machines—first as a field tech, now as a sales lead for an oil filling machine supplier—I’ve seen way too many production runs derailed by avoidable clogging, cross-contamination, or even breakdowns that could’ve been fixed with a 90-minute clean. I’ve watched operators cut corners (skipping a flush or using the wrong chemical) and end up with bottles of motor oil labeled as hydraulic fluid, or a filler nozzle gunked so bad it under-fills 20% of a batch. Today I’m breaking down the science of properly cleaning an oil filling machine, the mistakes to skip, and how this practice protects your product and extends your machine’s life. Oil Filling Machine

First, let’s get one non-negotiable rule straight: the type of oil you process determines your entire cleaning plan. A machine that runs 10W-30 motor oil needs a totally different approach than one that fills extra-virgin olive oil for food packaging, or biodiesel for agricultural equipment. I once had a customer who bought a 12-head gravity filler from us to switch from vegetable oil to canola oil for salad dressings. They skipped a deep clean because they “just changed oil before and it was fine” and ended up with 3,000 mislabeled bottles (plus a $1,200 scrap cost) because residual vegetable oil left a bitter aftertaste in 15% of the batch. That didn’t have to happen. Category-specific cleaning isn’t just a tip—it’s a safeguard against costly recalls.
Let’s start with the pre-clean step, which most people rush through but is the most critical for efficient cleaning. Before you touch any chemicals, shut down the machine, lock out/tag out all power sources (this is OSHA 101, never skip this), and drain the bulk oil tank completely. Don’t just leave the tap open—use a food-grade or industrial-grade siphon to pull every last drop out, because pooled oil at the bottom of the tank will oxidize (turn gummy) overnight and harden into a crust that’s almost impossible to remove later. Next, disassemble the contact parts: filler nozzles, check valves, hoses, and the top grate of the bulk tank. These are the parts that touch oil directly, so they hold 90% of the residual gunk. I always tell my field techs to sort these parts as they go: plastic, rubber, metal, and food-grade (if applicable), because you can’t clean a silicone gasket with a harsh industrial solvent the same way you’d clean a stainless steel nozzle.
Once you’ve disassembled, the bulk flush is your first line of defense, and here’s where people get this wrong. A lot of operators think just running a new batch of oil through the machine will flush out the old stuff. That’s not a flush—that’s a cross-contamination risk. A proper bulk flush uses a compatible carrier fluid to loosen and carry away residual oil, and the carrier depends on your oil type. For non-food industrial oils (hydraulic, motor, gear), a mineral oil-based flush is safe and effective; it dissolves heavy, oxidized oil residue without damaging metal components. For food-grade oils, you have to use a food-grade vegetable oil-based flush (not water-based, because water can get trapped in hoses and cause mold or rancidity) and ensure it meets FDA 21 CFR 175.300 standards. The flush step isn’t a quick pass: run 2-3 times the volume of your bulk tank through the machine, then collect the flush waste in a labeled, approved container to dispose of properly. This step alone cuts the amount of heavy scrubbing you’ll need by 60%, I promise.
Now, the deep clean: this is where you match cleaning chemicals to material compatibility, which is where I see the most mistakes. Let’s split this into contact parts and non-contact parts, because they require different care. For metal parts (stainless steel nozzles, check valve bodies, tank interiors), use a pH-neutral industrial degreaser for industrial oil machines, or a food-grade alkaline degreaser for food applications. Alkaline degreasers are great because they break down oil molecules without corroding stainless steel, but only if you rinse them thoroughly—leftover alkaline residue can react with new oil and cause foaming, which messes with fill accuracy. For plastic and rubber parts (silicone gaskets, Tygon hoses, nozzle O-rings), skip harsh chemicals entirely—use warm, soapy water with a mild dish soap that has no moisturizers or fragrances (these leave films) or a specialized plastic-safe degreaser. I once had a customer who soaked their rubber O-rings in industrial degreaser, and they shrunk to half their size, leading to massive leaks during filling. That’s a $50 mistake that cost them $2,000 in downtime.
Scrubbing time is another step where efficiency matters. Don’t use steel wool or wire brushes on any stainless steel parts—these leave tiny metal shavings that get trapped and will contaminate your next oil batch. Use a nylon bristle brush for tight spaces like nozzle inner channels, and a soft microfiber cloth for the bulk tank walls. For hard-to-reach crevices inside check valves or spray nozzles, a pipe cleaner (for metal ones, nylon, not cotton) works perfectly. I always tell operators to pay extra attention to the top of the tank and the bottom of the filler heads—these areas get less flow during normal operation, so residue builds up faster.
Rinsing is the step that almost gets skipped, and it’s make-or-break for product purity. After scrubbing all parts, you have to rinse twice, no exceptions. First, a warm rinse to remove all degreaser and loose residue, then a final rinse with the same carrier fluid you used for the bulk flush (or new oil for the next batch, if you’re switching to the same oil). For food-grade equipment, a third rinse with potable water (that meets local drinking standards) is non-negotiable, then a quick air dry with filtered, oil-free compressed air to prevent water spots or mold. For industrial machines, a final rinse with a small amount of the new production oil will also help lubricate moving parts during restart, which reduces wear on nozzles and valves.
The reassembly step has two key rules: use new gaskets and O-rings if any look worn or cracked, and torque all fittings to the manufacturer’s specifications (not tighter—over-torquing can strip threads or crack plastic parts). I’ve seen a customer over-torque a bulk tank drain valve so bad it cracked, leading to an oil leak that cost them 8 hours of downtime. Also, when putting the filler nozzles back on, make sure they align correctly with the bottle filling points—this prevents spills and ensures fill accuracy after cleaning.
Post-clean testing is non-negotiable, no matter how clean you think the machine is. Run a 5-bottle test batch: weigh each bottle, check for leaks, and if you switched oil types, take a small sample to test for cross-contamination (a simple surface tension test works for most oils). If all bottles are within ±0.5% of the target weight and no cross-contamination is detected, you’re good to go. If you see any discrepancies, that means you missed residue in a nozzle or check valve, so you have to disassemble and redo the deep clean—don’t run a full production batch before fixing that.
Now, let’s talk about cleaning frequency, which depends on how much you run your machine and what oil you process. For high-volume production (8+ hours a day, 5 days a week), you should do a full deep clean every 2 weeks, plus a quick post-run wipe-down of the nozzles and filler heads after every production shift. For low-volume runs (1-2 days a week), a deep clean every month is enough, but you should always do a full flush between different oil types—even if it’s the same oil category. I had a customer who runs small batches of olive oil and sunflower oil, and they waited a month to clean their machine between runs, leading to a faint olive oil aftertaste in their sunflower oil batch. A quick flush would’ve prevented that.
Beyond just cleaning for product purity, regular deep cleaning extends the life of your oil filling machine. Oxidized oil residue is like sandpaper inside nozzles and check valves, causing wear that leads to leaks, inaccurate fills, and expensive part replacements. We’ve had customers who follow our cleaning schedule report 30% fewer unscheduled breakdowns and a 25% reduction in part replacements annually—those numbers add up fast.
I know that for small operators, cleaning the machine feels like a chore that takes time away from production. But let’s do the math: a 90-minute deep clean every 2 weeks adds up to 195 hours a year, vs. an average of 8 hours of downtime for a clogged nozzle or contaminated batch. That’s a no-brainer.
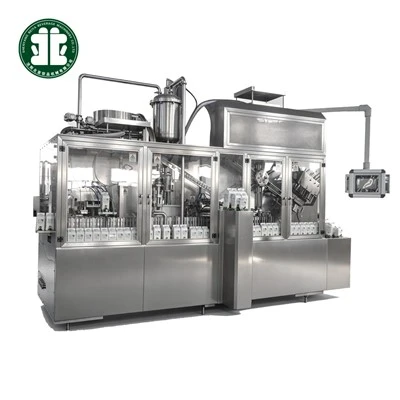
If you’re tired of dealing with cross-contamination, machine breakdowns, or product recalls from poor cleaning, I’m here to help. We build oil filling machines designed for easy disassembly and cleaning, with parts labeled for quick sorting (no more mixing metal and rubber parts during cleaning) and food-grade materials that meet global standards. We also provide a custom cleaning schedule tailored to your production volume and oil type, plus on-site training for your team so you don’t have to guess about chemicals or disassembly steps. Whether you’re a small-batch artisanal oil producer or a large industrial lubricant manufacturer, we’ll work with you to find the right solution for your needs. If you’re ready to streamline your cleaning process and reduce downtime, reach out to our team to discuss your requirements and get a free quote. No generic plans, no one-size-fits-all solutions—just practical advice and equipment built to make your job easier.
Coffee Bean Filling Machine References
- Occupational Safety and Health Administration (OSHA). Lockout/Tagout: Standard 29 CFR 1910.147. U.S. Department of Labor, 2023.
- Food and Drug Administration (FDA). 21 CFR Part 175: Indirect Food Additives: Adhesives and Components of Coatings. U.S. Food and Drug Administration, 2022.
- National Fluid Power Association (NFPA). Cleaning and Maintenance Guidelines for Industrial Fluid Systems. NFPA Press, 2021.
- International Organization for Standardization (ISO). ISO 19408:2015, Specification for Food-Grade Lubricants. ISO, 2015.
Shenyang Beiya Beverage Machinery Co., Ltd.
With abundant experience, we are one of the most professional oil filling machine manufacturers and suppliers in China. If you’re going to buy customized oil filling machine made in China, welcome to get quotation from our factory. For price consultation, contact us.
Address: No. 2-1, Tongling Street, Yuhong District, Shenyang City, Liaoning Province, China
E-mail: market@sybeiya.com
WebSite: https://www.chinafilling.com/
